Showing posts with label birthday. Show all posts

Tuesday, March 21, 2017

"The Great British Bake Off Perfect Cakes & Bakes to Make At Home" - Bitter Chocolate Stout Cake for my husband's birthday


Date I made this recipe:  March 4, 2017 for my husband's 60th birthday

The Great British Bake Off Perfect Cakes & Bakes to Make at Home by Linda Collister, with recipes by Mary Berry & Paul Hollywood and the Bakers of 2016
Published by Love Productions/Hodder & Stoughton
ISBN: 978-1-473-61544-1; © 2016
Purchased at Bibelot, St. Paul
Recipe:  Bitter Chocolate Stout Cake – p. 40-42

Well folks, my darling husband just commenced firing on his 6th decade which gave me the perfect excuse to make a recipe from this book.  And not just any recipe, reader, but a recipe involving chocolate and chocolate stout (beer) which he considers to be food of the gods.  I cannot argue with that!

Now even though Andy has a mean hand when it comes to making cakes, pastries and pies, particularly pies, I did not buy this book for him because he wouldn't have used it.  Instead, I do what I often do for Christmas and that is to buy a bunch of cookbooks for myself that I label as being from him; he does the same with bicycle parts that he wants and it works like a charm! In this case, although I would have purchased this book anyway, (from "me" to "me"), as soon as I saw the Bitter Chocolate Stout Cake recipe, I knew I would earmark it for his upcoming 60th birthday because that's the kind of spouse I am!

I've mentioned in previous blogs how much I love The Great British Bake Off, the TV show responsible for cookbooks like these of the same name, and I won't go into a lot of detail here except to say I have updates and folks and fans, they are not necessarily good updates so brace yourselves: the show is leaving the BBC for another network that is not the BBC.  There, I said it.

You may be thinking "Well, so what?" but apparently this decision might just derail the show all together because judge Mary Berry, and hosts Sue Perkins and Mel Giedroyc decided not to make the move and so are- gasp- out!  Double gasp!  How can this be?  The only one left standing who decided to try out the new network is judge Paul Hollywood. 

I am trying, unsuccessfully, to imagine a show with only Paul as the host.  I loved those three other ladies.  Loved them.  Now what?

Well not only did all of Britain have a collective meltdown but here in the U.S. we are left wondering "what next" as well because the show aired for us here on PBS which often rebroadcasts BBC shows.  So no BBC in Britain likely means no PBS rebroadcast here.

I shall stay as on top of this situ for you as I can.

Meanwhile folks, back to the cookbook and here is where I must take a few moments to critique the cookbook which I now call The Great British Bitch-off.  Why?  Because of the countless challenges I encountered while trying to pull together a simple birthday cake.  A simple chocolate + stout birthday cake.

First, and in case you didn't know, England uses mostly the metric system for measuring things which means that instead of ounces, we're talking grams, instead of fluid ounces, we're talking liters and so on.  And while conversion charts abound (including one in the back of the book but not the front of the book which would have been more helpful), almost none of the measures I needed was on that inconvenient chart which meant I had to weigh them out anyway.  Besides, all the chart did was convert grams to ounces and I do not keep a runny tally of ounces needed in my head:  it's "cups" or bust!

But then to really yank this Yank's chain, some of the ingredients were in teaspoons and tablespoons.  Well fine, then, be that way.  In my opinion, not enough of the ingredients were in teaspoons but I take my wins where I could find them.

Still in all, measuring grams or ounces required a kitchen scale and let me say right now and we shall consider this a new and mandatory rule:  if you don't have a kitchen scale, get one. If you don't want one, this is not the recipe or cookbook for you.  Even then, by the time I finished measuring out the ingredients (both on a scale or by hand), I'd say a good hour had passed and I hadn't even started baking yet.  Major point deductions for that, folks.  Major.

Then there was the "guess what this ingredient is called in the U.S." game that I had to play with a couple of the ingredients listed in this recipe such as "light muscovado sugar" (light brown sugar), or "icing sugar," which is confectioners' sugar.

In fact, small story here about confectioner's sugar.  I Googled "icing sugar" and finally found a video of a British baker mixing regular sugar and cornstarch together in a Cuisinart.  So then I Googled "sugar and cornstarch" and up poppef "confectioners' sugar."  Ah ha!  So I doubled checked C&H's (sugar producer) website but couldn't find confirmation that icing sugar and confectioners' sugar were one in the same.  And the customer service person was no help.  When I asked her if "icing sugar" was the same as "confectioners' sugar" she said "I have no idea."

Really?  I mean, you work for a sugar company, surely you'd know this.  So I put on my best attorney voice and then said "Well, can you at least confirm (or deny – your choice) that confectioners' sugar is a mixture of regular sugar and cornstarch?"  "Yes, I can confirm that."

Now really, was that hard?
Okay then, so once I resolved those two issues, I was almost ready to go.  Still to be resolved:  how to make "self-rising" flour at home because I sure as heck wasn't going out to buy a large bag that I would never use.  This one was easy:  mix 1 cup of flour with 1 ½ teaspoon baking powder with ¼ teaspoon salt. Piece of cake, 'scuse the pun.  Except folks, it wasn't exactly a piece of cake because I needed more than 1 cup self-rising flour.  In fact, I needed 250g or 9 ounces.  Well, I was all out of patience with today's math problems so what my husband suggested and what I did, was to make up another cup of the mixture then measure out the 9 ounces I needed on my kitchen scale and then toss the rest.  I hate wasting ingredients but at this point, I just needed to get this cake done already.

The last thing I needed to do was to convert the measurements for the British baking pans and that was somewhat easy:  two 20.5cm pans are equal to two 8" round cake pans.  I know this because I have a tape measure in my kitchen with inches on one side and those ghastly centimeters on the other.  Not that I keep it around for projects like this but since I did and it was handy, it saved me yet another trip to my computer.

Please note that between tax, license, Google searches and measurements, the total elapsed time was now about two hours.  Good thing I decided to give this recipe a dry run the night before I served it.  Also?  This was one of the easier recipes in this book!

Speaking of which, please do make a note that the subtitle of this cook is "Perfect Cakes & Bakes To Make At Home," and no offense to the show, but are they kidding me? Let's take a look at our chapters and then we can talk:

  • Cakes ("Greek Lemon-Yoghurt Loaf Cake;" "Bitter Chocolate Stout Cake")
  • Biscuits & Teatime Treats ("Mexican Wedding Cookies;" "Posh Granola Bars")
  • Breads ("Sprouted Wheat Bread;" "Cobbled Chocolate Loaf")
  • Desserts & Puddings ("Chocolate-Hazelnut Rochers;" "Grand Strawberry Mouse" with homemade ladyfingers, no less.)
  • Sweet Pastry & Patisserie ("Bitter Chocolate and Pear Tartlets;" "Gateau St-Honore," and even though "gateau" is the French word for "cake," you should run away from recipes like this because they are involved.  Very involved.)
  • Savoury Bakes ("Roast Vegetable and Cashew Pie;" "Duck and Pistachio Pate En Croute."  Let that last recipe just sink in, okay?)

Some translation is required and so please make a note that:
  • Biscuits = cookies
  • Puddings = other desserts and not necessarily [Jell-O]pudding as we know it.
  • Savoury, or as we say in America "savory," are things like crackers or canapés.

Far be it from the Brits to call a spade a "spade!"

Anyway, in my opinion, the degree of difficulty rises as we move from chapter to chapter.  The first one – "Cakes" – is relatively harmless except for the time spent measuring and "translating" ingredients.  But by the time we hit "Desserts & Puddings," my baking poker hand was getting weaker, by "Sweet Pastry & Patisserie," I was  bluffing badly, and by "Savoury Bakes," many of which require the use of phyllo dough, I folded!  Now then, will the person who makes "Duck and Pistachio Pate En Croute" at home on a regular basis please contact me ASAP?  Thank you.

And so now back to our recipe, already in progress!  Once I got everything measured, putting it all together didn't take long but cleaning up afterwards did.  I don't know about you, but I find working with melted chocolate to be a challenge because the cocoa "butter" in the chocolate itself makes it greasy and greasy items take some real elbow grease to get clean.  And since I had to melt chocolate a few times over for this endeavor, I was constantly wiping down melted chocolate from pans and bowls and spatulas and walls since it splattered here and there. 

So I tell you what, if it wasn't for my husband's birthday and his love of the two primary ingredients, I might have been tempted to chuck this book into the nearest dust bin (British-speak for "waste basket") but a birthday comes but once a year and a 60th birthday is special.  Plus, and this is the big thing, the cake was delicious.  The cake itself was a little dry but only a very little, probably because I baked it the full 25 minutes but that's because it was still soupy at 22 minutes (baking time was 20-25 minutes).  Fair warning then: somewhere between 23 and 24, but not 25 minutes, is where you want to land.  Had judge Paul Hollywood sampled it, he would have likely said "It's good, but the sponge – which he pronounced "spooonge" is a little dry," so thank goodness for the frosting which was the real star of the show.

I have previously mentioned in this blog that I am all about the frosting as the cake doesn't interest me much at all, and this frosting was delicious.  That "icing sugar" (!) was just the ticket and I could have eaten the entire bowl and skipped putting it on the cake all together except Andy had some guy friends over and we needed to be able to serve a frosted cake to our 15 or so guests. Said guests then inhaled every single crumb of this cake, every single piece and so my plan for leftover frosting (and oh sure, the cake, too) went out the window.  Damn and blast!

Now then, I have one last piece of unfinished business to discuss and it's the alcohol in this cake.  For those of you with concerns, let me just talk out loud about a couple of things:  You might (emphasis on "might") be able to substitute a chocolate syrup mix for the chocolate stout if you wish; consider the "Hot Bitter Chocolate Sauce" recipe on p. 20 of the book.  You might also consider using a slurry (I just love that word) of chocolate syrup, malt powder (used in the recipe) and milk instead of the alcohol.  Or, you can think of it this way:  the recipe calls for 150ml of chocolate stout (or porter) which is the equivalent of just over 5 ounces (8 ounces is a cup).  Andy cut this cake into 15 slices and so it you divide out that 5 ounces into 15 slices, you basically have about an eye dropper full of chocolate stout per piece which is to say not much of anything.  That said, I am not here to encourage you to cook with alcohol if you're uncomfortable, but I think it was there to just enhance the flavor and add to the volume without intending to give anyone a hangover.

All in all, my husband had a great 60th birthday and this cake helped a lot.  He was a little nervous about inviting "the guys" over since sometimes men can be reticent about going to a birthday party, but a good number of them came over and enjoyed the cake and other savoury/savory items, and it was a lot of fun.  I'm still on the fence about the level of fun I experienced making the cake but that is to be expected as the bakers in this cookbook were all (2016) contestants on the show and they could out-bake me with their hands tied behind their backs.  In the end, I'll take the fact that I didn't go nuts, didn't scream at anybody and didn't burn down the house as my own version of a "win" on The Great British Bake Off – "At Home with Ann and Andy!" 

Bitter Chocolate Stout Cake – serves 10-12 – Ann's Note:  it helps to have a kitchen scale
For the sponge
40 g cocoa powder
1 tablespoon malted-milk drink powder (use "original," not diet or flavoured versions)
150 ml chocolate milk stout OR porter
150g unsalted butter, softened
120g caster sugar (Ann's Note:  a/k/a superfine sugar)
120g light muscovado sugar (Ann's Note:  a/k/a light brown sugar)
2 medium eggs, at room temperature, beaten to mix
4 tablespoons buttermilk, at room temperature
250g self-raising flour (Ann's Note:  *see below for how to make this at home)
¼ teaspoon bicarbonate of soda (Ann's Note:  a/k/a Baking Soda)
Good pinch of fine sea salt

*The standard "recipe" for making self-rising flour is to add 1 ½ tsp baking powder and ¼ tsp salt to 1 cup All Purpose Flour.  Since you will need more than that for the recipe, make a double batch of the recipe then weigh it and subtract out what you don't need. 

For the chocolate filling and frosting
85g dark chocolate (about 70% chocolate solids)
1 ½ tablespoons malted-milk drink powder ("original")
2 teaspoons cocoa powder
2 tablespoons boiling water
115g unsalted butter, softened (Ann's Note:  one stick of butter is 113g so you will need a little more from another stick)
25g light muscovado sugar (Ann's Note:  a/k/a light brown sugar)
75g icing sugar (Ann's Note:  a/k/a Confectioner's sugar)
Good pinch of sea salt flakes, or to taste

To finish
15g dark chocolate (about 70% cocoa), grated

Pans
Ann's Note: You'll need two 20.5cm round, deep sandwich tins, greased with butter and base-lined.  Translation:  two 8" round cake pans, greased then lined with parchment paper. I have no idea why round cake pans are called "sandwich tins," but mine is not to question why, mine is to Google search to figure it out!

Heat the coven to 350F.  Measure the cocoa and malted milk powders into a small pan, add the milk stout and set over low heat.  Whisk constantly with a small hand wire whisk until the mixture is smooth and comes to the boil – take care it doesn't catch on the base of the pan.  Remove from the heat and leave until cooled to room temperature.

Meanwhile, put the softened butter into a mixing bowl, or the bowl of  free-standing electric mixer fitted with the whisk attachment, until creamy and mayonnaise-like.  Scrape down the side of the bowl, then beta in the caster sugar.  As soon as it is thoroughly amalgamated, beat in the muscovado (light brown sugar) sugar (press out any lumps first).  Once combined, scrape down the side of the bowl again, then beta for 2 minutes to make a soft, light creamed mixture.

Gradually add the eggs, beating well after each addition and scraping down the side of the bowl from time to time.  Beat in the buttermilk a tablespoon at a time, adding a tablespoon of the weighed flour with the last 2 additions.  Sift the remaining flour with the bicarbonate of soda (baking soda) and salt into the bowl.  Add the cooled cocoa mixture.  Mix in using the whisk on its lowest speed, stopping as soon as the mixture is very smooth.

Divide the mixture equally between the 2 sandwich tins and spread evenly.  Bake in the heated oven for 20-25 minutes until the sponges are well risen and springy when gently pressed in the center. (Ann's Note:  20 minutes is too short.  Twenty two minutes was also too short. Twenty five minutes was too long.  Try for 23-24 and then stop.  Immediately.)  Remove from the oven and run a round-bladed knife around the inside of each tin to loosen the sponge, then turn it out on to a wire rack and leave to cool.

When sponges have cooled to room temperature, make the chocolate mixture for the filing and frosting.  Gently melt the chocolate then leave to cool until needed.  Put the malted-milk powder and cocoa powder into a small heatproof bowl, add the boiling water and stir to make a smooth paste.  Leave to cool.  (Ann's Note:  this didn't really make a paste as it was more like a thick syrup.  No matter, it worked.)

Beat the butter in a mixing bowl until very creamy using a wooden spoon or hand-held electric whisk, then beat in the muscovado sugar (press out any lumps first).  Add the cooled melted chocolate and beat well, then beat in the cooled cocoa liquid.  Sift the icing sugar (confectioner's sugar) into the bowl and beat, slowly at first, until the mixture is very smooth and light in texture.  Sprinkle over the salt and stir in.

Now set one sponge, crust-side down, on a serving plate.  Spread over half the chocolate mixture.  Set the other sponge on top, crust-side up.  Spread and swirl the rest of the chocolate over the surface.  Grate the dark chocolate on top – or decorate with chocolate curls shaved off with a vegetable peeler.  Leave the frosting to firm up for at least 2 hours before cutting the cake.  Store in an airtight container and eat within 4 days.

Ann's Final Note:  I didn't have time to let the frosting firm up but it was just fine and met my strict frosting requirements, thank you very much.  Also, intriguing as it is to know that this cake lasts 4 days, I don't think it lasted for four minutes once Andy started cutting it. Of course, it helps to have 15 people helping to eat it but still, this was one tasty cake.  It looked like hell but I was not trying for bakery-competition worthy so there you go. 


Saturday, February 4, 2017

"The Tasha Tudor Cookbook" - Date and Nut Bread for my late mother's birthday


Date I made this recipe:  January 25, 2017 – my mom's birthday

The Tasha Tudor Cookbook – Recipes and Reminiscences from  Corgi Cottage by (illustrator) Tasha Tudor, Featuring More than 80 of Tasha Tudor's Favorite Family Recipes
Published by Little, Brown and Company
ISBN: 0-316-85531-6; copyright 1993
Recipe:  Date and Nut Bread – p. 35

Today, January 25th, was my mom's birthday.  The day before, January 24th, was my dad's.  They've been gone now for several years but I always try to observe their birthdays by making something they would have enjoyed.  And this is how I ended up making Date and Nut Bread but not just any old date and nut bread, Tasha Tudor's Date and Nut Bread.

My mother loved Tasha Tudor's illustrations.  She particularly loved Tasha Tudor's illustrations in the [classic children's] book, The Secret Garden by Frances Hodgson Burnett.  The book, first published in 1911, was a favorite of my mom's and yet, I honestly don't recall her ever reading it to me or me ever reading it.  Interesting, that.

Before I get to Tasha Tudor though, I have to say a bit about The Secret Garden, a book I finally read this past summer and really enjoyed.

The central character of The Secret Garden is a young, orphaned British ex-patriot, Mary Lennox, who was living in India with her parents when a cholera outbreak killed her parents and most of the servants.  Mary's character is the book is most unloved: she is a sickly and petulant child, prone to temper tantrums and is spoiled rotten.

After her parents died, she was sent to England to live with her "hunchback" uncle, a widower, and his equally petulant and sickly child, Colin, at a house in the English countryside. Colin is the male version of his cousin, and when we meet him, he is bed-ridden, convinced he is dying.

Then one day, Mary and another boy, Dickon, the brother of one of the servants, stumble onto a "secret" garden. Turns out that Mary's aunt died after an incident in the garden, and her uncle's grief was such that the garden was left to rot and ruin until, of course, Mary and company saved the day. 

Thereafter, the book is as much about the restoration of the soul as it is about the restoration of the garden, and Mary and Colin and Dickon spend a lot of time in their secret hiding place/spiritual retreat, The End. Well, there's more to the story than that, of course, but why spoil things for you?  Suffice it to say that I enjoyed the story and could picture this "magical" garden in my head even though my life motto is (seriously) "Nature is not your friend."  But this is England folks, and the Brits are quite known for their fabulous gardens.  In fact, one of the songs I learned in childhood, English Country Garden, was featured on the TV show, Captain Kangaroo.  I'm pretty sure one of my early piano books contained that song (music) as well and now I'm sitting here thinking that I need to take up piano playing again!

So Frances wrote the book and then Tasha Tudor illustrated one of the versions and that is how my mother came to know both ladies.  But I must confess that I was a little surprised that the illustrations were a little on the shy side and not just in Tasha's version, but in many other illustrated versions I looked at.  I think back in the day, the emphasis was on the book and not so much the art but that's just speculation and recollection.

In addition to The Secret Garden, Tasha also illustrated A Child's Garden of Verses, The Night Before Christmas, The Doll's Christmas, and A is for Annabelle which rings a bell with me as I think I might have owned that book as a child.  You should also know that Tasha was a two-time Caldecott award winner, an award given to the artist who illustrated a "most distinguished picture book for children." And as you might imagine, The Tasha Tudor Cookbook is filled with delightful illustrations as well.

So anyway, one day mom mentioned in passing that she liked Tasha Tudor and The Secret Garden, and so I tucked that information away for future use.  And so sure enough, shortly thereafter, I was out Christmas shopping, stumbled upon a book, The Art of Tasha Tudor, and knew I had to buy it for mom.  If memory serves, this may have been the last Christmas present I gave her; she passed away in March 2008. 

Well, to say my mother was "gobsmacked" (a British term meaning "utterly astonished") is an understatement.  In fact, "touched" is probably the word that fits best as she couldn't believe I remembered what she said, much less bought her this book filled with Tasha's artwork, including illustrations from The Secret Garden.  Well, I am a list-keeper from way back and so was happy to have noted it and also put that notation to good use.

And then as luck would have it, I was [vintage] cookbook shopping online  one day when I once again stumbled upon a Tasha Tudor book, this time The Tasha Tudor Cookbook.  Huzzah!  Well now I was cooking with Crisco, wasn't I?

So as soon as it arrived, I made a note on my calendar to make something from it for mom's birthday and so I did and it was this Date and Nut Bread.  My mother made Date Nut (we left out the "and") bread all the time and the recipes are very similar and equally delicious. 

Back when mom made it, she chopped the dates herself and also chopped the nuts in this vintage nut chopper that I now own.  Thanks to advances in date chopping, I was able to buy my dates already chopped and ready to go, leaving me with only the nuts to chop and add to the mix.  And yes, I could have purchased already-chopped nuts as well, but I felt I needed to put some kind of labor into it to make it more authentic.  Besides, chopping dates is sticky business and I was happy to let go of that task.

This is an easy recipe as were the vast majority of the recipes included by Tasha in her cookbook. Her Table of Contents includes:  "Appetizers and Salads;" "Soups;" "Breads and Muffins;" "Main Dishes;" "Accompaniments;" "Dessert and Beverages," and "Christmas Treats," and while several recipes were tempting, I had to go with the bread, final answer.

Now before I get to the recipe, I have to share a few tangential stories with you about cosmic coincidences—or are they?

In September 2016, I once again visited my mom's only surviving sister, Mary, who lives in Michigan where I am also from.  My aunt's house is in Michigan's north woods and as you might imagine, there are lots of animals there, including deer. I'm mentioning deer because you should know that my dad was a wildlife research biologist who specialized in white-tail deer and who managed a research station a couple hours away in Michigan's Upper Peninsula.  Deer factor into our story.

Okay then, well as you can imagine, my aunt and I spent some time discussing my mom and what their childhood was like and it was great reminiscing although I couldn't help but wish that mom was there with us.  Or was she?

Because, reader, on my last morning there, I needed to run into town to pick up some things for my aunt, and just as I rounded the corner to her house and driveway, a doe and two fawns crossed the road in front of me.  Well that gave me chills because really, what are the odds that a momma deer and two baby deer would be there at that exact moment?  Plus, they paused for a minute to look at me instead of just high-tailing their white-tails outta there!  I have to say, I took this as a sign.  (Sadly, I didn't see a daddy deer but maybe he let momma and "kids" have their own moment with me?)

Later that day, I flew home, still thinking about the deer in the woods, and the next day I was channel-surfing and I kid you not, the movie The Secret Garden was playing.  Kid you not.  Honestly, what were the odds!  I have to say, it was a bittersweet moment for me and just kind of brought the whole mom thing full circle.

So Happy "Heavenly" Birthday, Mom, and thanks for the introduction to Tasha Tudor and to The Secret Garden.  And PS, thanks for "showing up" at Aunt Mary's. You could not have timed it better.

Date and Nut Bread- makes one 4 ½ x 9-inch loaf or two 3 x 6-inch pans
1 cup dates, chopped
½ cup sugar
¾ cup boiling water
¼ cup (1/2 stick) unsalted butter, softened
1 farm-fresh egg, well beaten
1 teaspoon baking soda
1 ¾ cups unbleached flour
½ teaspoon salt
½ cup English walnuts, chopped

Great well one 4 ½ x 9-inch loaf pan or two 3 x 6-inch pans.

In a large mixing bowl, combined the dates, sugar, and boiling water.  Mix well and allow to cool.

Preheat the oven to 350 degrees F.

When the [date] mixture has cooled, stir in the remaining ingredients.  (Ann's Note:  make sure your butter is really soft.) Pour the batter into the prepared bread tin.

Bake in the preheated oven for 40 to 50 minutes (less for smaller loaves) or until done when tested with a toothpick.  (Ann's Note:  mine baked for 55 minutes before it was done). 

Remove the bread from the oven, take it out of the pan, and place it on a rack to cool completely.

Ann's Note:  Tasha suggests slicing this bread very thin and then spreading it with cream cheese but when I was a kid, I must have put on an inch of butter (actually, margarine) instead.  Yum!


Saturday, October 29, 2016

"Extreme Brownies" by Connie Weis - Birthday treats!


Date I made this recipe:  October 19, 2016 – Happy Belted Birthday to me – dessert!

Extreme Brownies – 50 recipes for the most over-the-top treats ever by Connie Weis
Published by Andrews McMeel Publishing
ISBN: 978-1-4494-5032-8; copyright 2014
Purchased at Barnes and Noble
Recipe:  Holy Heavenly Hash Brownies – p. 37-38

My birthday was a few weeks ago but I didn't really get my birthday cake.  Oh sure, I had cake and ice cream for dessert at Spoon and Stable, but it wasn't really "birthday cake" birthday cake which is to say it didn't have frosting.  It was "fancy" cake  - a lovely honey cake with sweetened condensed milk ice cream and caramel and...stuff.  It was the type of dessert for which restaurant pastry chefs win James Beard Awards. The presentation was spectacular, it tasted divine, but it wasn't "cake" cake.

When it comes to cake, it seems to me that people are either "cake" people or "frosting" people, but not normally both.  I am a frosting person.  Final answer. Cake is okay (my husband likes cake) but I am all about the frosting.  ALL about.  The more the better!  My favorite is Seven-Minute Frosting, a frosting my mother favored for the angel food cakes she made for all of us for our birthdays, but it would have been unseemly for me to make and then eat an entire bowl of it, wouldn't it?

So, I punted.  Instead of making or buying a cake, I, for the first time ever, had birthday brownies.

I love brownies.  I love brownies better than cake.  Maybe it's because brownies are a lot more dense and the flavor stands out more.  Or maybe it's because brownies are portable:  I cannot tell you how many times I stuff a cling-wrapped brownie into my purse for "sustenance."  (Cookies get the same treatment).  Cake is much harder to transport and of course, frosting, nearly impossible!

And folks, were these brownies ever good.  Really good. Plus, and I am chuffed to say this, my brownie looked exactly like the brownie featured on the cookbook cover – exactly!  That almost never happens.

But I have to tell you, I am not sure I can take credit for this success because it was a matter of following directions. Granted, there are many steps involved in making these but I was patient and I also made them over the course of two days.  I started the brownie layer one night but then ran out of time to do justice to the other layers so I started anew the next afternoon.  Sometimes taking a leisurely approach has its benefits.

Since my cookbook collection is ever-growing, I often box up and store cookbooks once I have used them but not this time around.  This time around, there's potential for reuse because of all the scrumptious recipes found in this book, of which today's featured brownie is one of them. 

And I'll just say that if you cannot find a brownie to suit in this book, it's because you are not looking hard enough.  There are "chip" brownies, fruit brownies (like raspberry), coffee brownies, mint brownies (ew), candy brownies and cordial brownies.  And then there are blondie brownies with all kinds of flavors and toppings, such as apple walnut and lemon coconut and even fruitcake blondies.  I love both kinds of brownies but I had to go with chocolate and happily, there are several other delicious chocolate brownie recipes that I might have to double back and try.

So.  Things to know about this recipe for Holy Heavenly Hash Brownies are that you'll use several kinds of chocolate and chocolate chips (bring it on!) and also a small amount of chocolate extract.  Let's discuss this last ingredient.

I tried to find chocolate extract before I made these brownies, but after trips to three different grocery stores (a few that were upscale), I didn't find it and wanted to get these brownies baked before I aged another year.  It would figure then, that about a week after I made them (and we inhaled them), I stopped at Penzy's (spice store) who didn't have them but referred me up the street to the Golden Fig Fine Foods.

I've mentioned the Golden Fig before; it's a specialty foods shop on Grand Ave in St. Paul. And sure enough, they had chocolate extract and a few other extracts that might come in handy.

Since owner Laurie McGann Crowell was there that day, we had a little chat about the extract and how it just adds a nice, smooth, subtle chocolate flavor to baked goods.  Plus, it had an expiration date of 2018 so that was in its favor; longer is better.  It's a little pricey compared to other extracts, but I think it was worth it. And of course, it gives me another reason (as if I needed one) to make these brownies again.  Sold!  By the way, you can mail order this item if Laurie's store is not in your neighborhood.  The brand is Nielssen Massey and you can find it online.  Pricewise, Sur La Table is the "best" of the online bunch, coming in at $8.00.  My bottle cost $6.95 and looks like that was a steal; Amazon's price is $14.99 – yikes!

Now I'll warn you that the ingredient list looks long (and hopeless) but it's really not.  If you bake at all, you likely have three-quarters or more of the items you need already on hand.  And I must confess to leaving out the almonds.  Much as I like almonds, I just didn't want them in my brownie.  And since it was going to be my birthday brownie, I got to do what I wanted. 

One other tiny confession:  I did not freeze the brownie layer for a short time period as directed.  Since I made the brownie base the night before, I just wrapped it up and let it set out.  In hindsight, I might have wanted to at least refrigerate it for a bit.  The brownies were a little squishy (but in a good way) and they probably would have benefitted from firming up just a bit.

Finally, these are very rich, so you might want to consider making a half a batch like I did and then cut yourself a tiny piece a day until they are all gone.  And remember, as with the mini meatloaves I made earlier in the week, there are next to no calories in mini bites. 

Birthday or not, you need to make these!

Ann's Note:  you'll notice the author gives you the ounces needed for each ingredient. Since I have a kitchen scale, I weighed most of mine (but not all) but if you don't, you might want to eyeball some of them because 1 cup is not always 8 ounces. For example, notice that 1 cup of sugar = 7 ounces, not 8 but you will use a full cup (8 ounces) for your light brown sugar but not a full cup for your flour (use 4.5 ounces).  Bakers like to weigh things!

Also, page xvii contains her tips for measuring, baking, whisking and whatnot.  If you have the book, you might want to take a look-see.  That said, I have the book and did I look there?  Nope [insert sheepish look here].

Holy Heavenly Hash Brownies – makes 12 large squares or 24 smaller bars
Brownie Batter
Vegetable shortening for pan
2/3 cup (3 ounces) roasted salted whole almonds
½ cup (3 ounces) semisweet chocolate chips
2 sticks (8 ounces) unsalted butter
3 ounces unsweetened baking chocolate
1 cup (6 ounces) 60% cacao bittersweet chocolate chips
4 large eggs, room temperature
1 cup (7 ounces) granulated sugar
1 packed cup (8 ounces) light brown sugar
¾ teaspoon salt
1 ½ teaspoons pure vanilla extract
1 cup (4.5 ounces) bleached all-purpose flour
½ teaspoon baking powder

Chocolate Nougat
4 tablespoons (2 ounces) unsalted butter
1 cup (7 ounces) sugar
¼ cup (2.2. ounces) evaporated milk
7.2 ounces (1 ½ cups) marshmallow creme, such as Fluff
½ cup (3 ounces) 60% cacao bittersweet chocolate chips
¼ teaspoon salt
1 teaspoon pure vanilla extract
½ teaspoon pure chocolate extract (Ann's Note:  Naturally, I didn't purchase mine until after I was done with the recipe.  I couldn't find it before then.  If you don't have it, you can leave it out.)

Topping
1 ½ cups (2 ounces) miniature marshmallows
¼ cup (1 ounce) roasted salted whole almonds
2 tablespoons (1 ounce) semisweet chocolate chips

Chocolate drizzle
1 tablespoon (0.05 ounce) unsalted butter
1 teaspoon (0.02 ounce) light corn syrup
¼ cup (1.5 ounces) semisweet chocolate chips
1 teaspoon very hot water

To Make the Brownies
To make the brownies, adjust an oven rack to the middle level of the oven and preheat to 350F.  Prepare a 9 by 13-inch baking pan with heavy-duty aluminum foil as shown on page xvi.  Lightly great the foil in the pan.

Cut the almonds in half widthwise and place in a small bowl with the semisweet chocolate chips.  Set aside.

Cut the butter sticks into 1-inch slices.  In a small, heavy saucepan, melt the butter pieces over the lowest setting.  While the butter is melting, chop the unsweetened chocolate into ¼-inch pieces and add to the melted butter along with the bittersweet chocolate chips.  Use a small whisk to speed the melting process.  When the chocolate is melted and completely smooth, turn off the heat but leave the saucepan on the burner while proceeding with the recipe.

Using a large whisk, lightly beat the eggs in a large mixing bowl.  Place the sugars and salt in a separate small mixing bowl, then whisk into the eggs just until incorporated.  Briefly whisk the melted chocolate mixture, then gradually whisk into the egg mixture until just combined.  Briefly whisk in the vanilla.  You can set aside the saucepan – no need to wash it – to use for the chocolate drizzle.

Place the flour and baking powder in the small mixing bowl; whisk together to combine.  Sift through a medium strainer directly onto the batter; stir in with a silicone spatula until just combined.  Sprinkle the almonds and semisweet chocolate chips over the batter; fold in until just combined.  Pour the batter into the prepared pan and spread evenly with a small offset spatula. Bake for 28minutes, until a toothpick inserted in the center comes out clean.  Transfer the pan to a cooling rack and let cool at room temperature for at least 15 minutes, then transfer the pan to the freezer to chill the slab while preparing the chocolate nougat.

To Make the Chocolate Nougat
Cut the butter into ½-inch thick slices.  Place the butter, sugar, and evaporated milk in a medium (1 ½ to 2-quart) saucepan.  Cook over medium-low heat, stirring occasionally with a silicone spatula, until the butter is melted and the sugar is completely dissolved.  Increase the heat to medium-high and bring the mixture to a boil, then lower the heat to the lowest setting and boil gently for 5 minutes, without stirring.  Remove the pan from the heat and stir in the marshmallow creme until very well incorporated, then add in the chocolate chips, salt, and extracts, stirring vigorously until the mixture is well blended.  Dollop the nougat over the chilled brownie slab and spread evenly with a small offset spatula.

To Add the Toppings
Evenly place the marshmallows over the nougat, gently pressing to slightly embed them.  Cut the almonds in half, then embed them in the nougat; repeat with the chocolate chips.

To Make the Chocolate drizzle
To make the chocolate drizzle, melt the butter and corn syrup over low heat in the reserved saucepan.  Remove the pan from the heat and add the chocolate chips; stir with a small silicone spatula until the chocolate is melted and smooth.  Stir in the hot water to think it out.  Use the spatula to drizzle thin, random stripes over the top of the brownie slab.  Let the slab sit at room temperature for 15 minutes, then refrigerate pan for 7 to 8 hours or overnight.

Can be refrigerated for up to 2 weeks.

Ann's Note:  I mentioned above that I did not freeze the brownie slab for the allotted time, nor did I put the mixture in the refrigerator for 7-8 hours.  I mean come on—after all the work of making them, you want me to sit this out for another 8 hours?  Don't think so!


Tuesday, October 25, 2016

"Meals in Heels" and "She Cooks to Conquer" - Mini Meatloaf and Peas Penelope--the perfect birthday dinner!


 Date I made these recipes – October 16, 2016 – Happy (Belated) Birthday to me!

Meals in Heels – Do-ahead dishes for the dinner party diva by Jennifer Joyce
Published by Murdoch Books
ISBN:  9781741965520; © 2010
Purchased at The Bookcase (now closed), Wayzata, MN
Recipe:  Mini meatloaves with roasted tomato thyme sauce – p. 91

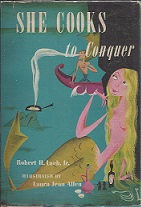
She Cooks to Conquer by Robert H. Loch, Jr.; Illustrated by Laura Jean Allen
Published by Wilfred Funk, Inc. New York
© 1952
Recipe – Peas Penelope – p. 44

So my birthday came and went and it was good which should not surprise me but it always does because for a long while, I was on a bad birthday streak.  It happens.  This year, Andy and I dined at a newer but extremely popular Minneapolis restaurant, Spoon and Stable, and I got a reservation for us without having to put up our home as collateral, huzzah!  And the dinner was not only great but it didn't cost us an arm and a leg.  Hand claps all around.

Still, this birthday gal likes a homemade birthday dinner and since I don't have family around to make one for me based on my requests, I had to do it all by myself.  And I'm happy to report that "myself" did a pretty good job! (Pats self on back.)

I must have been feeling all "woman power" when I selected these books – Meals in Heels and She Cooks to Conquer (a play on words of the play, She Stoops to Conquer, written by Oliver Goldsmith that premiered in 1773.  As a former English major, I knew all this which was why I bought the cookbook years ago.) And I think those titles are pretty spot on given my interests and personality, to wit:  I love shoes, and I do like playing to my strengths both in business and in cooking.

So, the shoes:  I am a frequent DSW shopper, following in the footsteps (pun intended) of my mother who also adored shoes.  My summer shoe collection although vast, contains fewer heels than it used to since I now like a flat, summer casual shoe (and adore flip flops). Come winter though, I switch to boots although anything that has a heel that looks like a toothpick is out. I'm now getting to the age where a slip and fall on high heels on the ice is a recipe for a hip replacement and I kind of like the hip I have.

I'm also probably getting to the age where I should purchase and use, one of the large gel floor mats that chefs use but dang, they're expensive and so I wear flats when cooking.  Heels, like the "heels" in our title would kill me and my back while preparing all these recipes.  But as soon as I'm done cooking and commence entertaining, I'm back in the spike heel game, baby!

This Meals In Heels cookbook is fun but it was written by a Brit and published in England so you'll see metric recipe measures first and then the American equivalents.  Always a total give-away, those metric numbers (that I still don't understand because I don't want to)! No matter, I coped as best I could although I have to say that dividing ingredients whether metric or not, can be challenging for me; "kitchen" math is not my forte (nor is "music" math and most especially "law math" i.e. billable hours).

The table of contents is divided into "Getting Started;" "Canapés;" "Starters;" "Mains;" "Stews & Roasts;" "Barbecue;" "Sides;" "Sweets," and "Basics."  Each section has a decent amount of delicious-sounding recipes.  My meatloaf recipe came from the "Mains" section (p. 91).

Also included are menus that are divided into seasons -  "Spring," "Summer," "Autumn," "Winter," as well as "Celebrations," and within that group, theme parties.  Sample menus are:  "Spring – Indian spice trail and French brasserie;" "Summer – American barbecue and Scandinavian summer;" "Autumn – Italian make-ahead and Movie night;" "Winter – Chinatown feast and Mediterranean dreaming," and "Celebration – Christmas holiday and Black-tie canapés."

And yet with all that, I narrowed down my choices to lasagna or meat loaf.  I know, I know, but it's the comfort food and the birthday food I crave and I am used to.

I hate to say, but the lasagna lost out at the last minute because of two things:  kale and béchamel sauce.  Over the years, I have expanded my lasagna horizons to include vegetable lasagna or even spinach lasagna but I draw the line at kale.  I know it's good for you and I'll eat it in a salad, but it is a crime against humanity to put it in a lasagna.

And as discussed numerous times in this blog, white sauce (béchamel) is not the sauce of my people and does not belong in a lasagna and so there went that.  And so...meatloaf!

My mother's recipe came straight from the back of the Quaker Oats canister and I loved it.  But it is a basic recipe and I was looking for a little more for my birthday meatloaf so I chose today's recipe - Mini meatloaves with roasted tomato thyme sauce.  Plus, you put the word "mini" in front of me and I'm in like Flynn.  I mean think of it—you get a tiny bite instead of a big one, and everyone knows that the word "mini" is synonymous with "less calories," right?  Unless, of course, you eat a "mini" portion(s) equal to a regular-sized one which is allowed under culinary rules when the first "mini" portion is so mini as to not be satisfying, in which case more minis are necessary!

Why do I suddenly feel like Bridget Jones here?

At any rate, that was the meatloaf saga.

As to the veg, these are my  two auxiliary rules regarding meatloaf:  1) it must be accompanied by potatoes of some sort and 2) it must be accompanied by peas.  Meatloaf + potatoes + peas = my perfect comfort/birthday meal.  Who says I'm not good at math—well, besides me?

But careful readers will have seen already that I did not include a potato recipe so what's up with that?  Simply, I did not like the potato recipes I found in the books I used for the other dishes and I did not have time to go routing around for another potato recipe.  And so, dear reader, I bought some "Fingerling potatoes with sautéed leeks," already prepared, from Whole Foods deli where I shopped for the meatloaf meat.  I must confess though, that I was hoping to buy some mashed potatoes from the hot bar buffet but did they have any potatoes that day?  No, they did not, dammit! That said, they had some mac and cheese and so I took a little bit of those.  They are not potatoes but they will do in a pinch.

The peas recipe came out of the other cookbook I used – She Cooks to Conquer – which is a play on a play She Stoops to Conquer.  The play is about a guy (gotta have the guy) who sets out to "conquer" a gal (gotta have the gal) only she outwits him and manipulates him until he falls for her instead of "conquering" her (whatever that means) because that is how these things are supposed to work out. It's your basic "rom com" formula and one that obviously stood the test of time because the play was written by
by Oliver Goldsmith and premiered in 1773.  Yes, you read that right.  I think it's reassuring to know that while many things change in life, this plot framework still works and works well.

Side note:  As an English major, I have always known of this play and author, yet I cannot recall whether or not I actually read it during my studies.  After a while, all these books and titles start to blur.  I can tell you though, that I have read Jane Eyre a million times (slight exaggeration), Antigone several times, all of Shakespeare's works too damned many times and Moby Dick twice when "none" time would have been sufficient.  I hope we can all agree that six hundred pages about a whale is a bit much.

Anyway, this concludes all I know about She Stoops to Conquer and other "good reads."

As to She Cooks to Conquer, here is what the dust-jacket said which is totally laughable in this day and age:  "Now, for the first time, the kitchen sorcery of Circe, that semi-divine enchantress of classical times, is used to bewitch, bewilder*, and enslave the male animal.  Here is a collection of the most man-appealing, taste-titillating recipes for the successful feeding of the MAN who comes to dinner." ( *I can't believe the author didn't include "bother" when he said "bewitch and bewilder" as Bewitched, Bothered, and Bewildered is a wonderful song by Rodgers and Hart (1940), a song I've sung several times over the years at various musical events.)

My reaction to those statements, you ask?  "Hahahahahahahaha...."  I think I particularly like "enslave the male animal." All I can say is recall that this cookbook was published in 1952 when women's sole job was to get married then stay at home to raise babies while the "MAN" went out to work...and hunt and trap food for the family. 

And so to help the enchantress "enslave" her man,  recipes are divided into chapters as follows:  "Even Had Only Adam but Circe Really Had'em';" "Initiating the 'Vessel Virgin';" "The Portable Primer for Your Man of Extinction;" "The Man Who Came to Dinner" (also the title of a play by George S. Kauffman and Moss Hart, 1939); "Dinner Quartet;" "Midnight Eatiquette;" "The Man Who Stayed for Breakfast," and "Homeric Recipes in English Translation."

I'll just let you ponder those titles for a minute.  Done?  Okay.  Once again, let me just remind you it was 1952.  Still, is there any excuse for this title – "Initiating the Vessel Virgin???!"

This is one of the few cookbooks I have where every recipe is illustrated.  The artist on this endeavor was Laura Jean Allen who illustrated everything from New Yorker covers to books such as Mr. Jolly's Sidewalk Market, Lots and Lots of Candy, A Dragon in a Wagon and The Thirsty Camel

In this cookbook, she broke down all the recipes and steps into illustrations/icons.  The front inside cover contains measurement drawings, for example a drawing of a big spoon which translates into a tablespoon; a half spoon for a ½ tablespoon; an illustration of a coffee cup for a cupful and so on.  And then for the recipe itself, she's drawn ingredients (like a box of peas for my recipe) as well as salt and pepper shakers and so on.  On the one hand, this method was unique – sort of like a kids' cookbook.  On the other hand, I found these instructions to be lacking in detail and I like details!  "Details, details, details...."

As to the recipe, it was good but I tell you what, if you are trying to watch your waistline, this is not the recipe for you because it calls two tablespoons of sugar and one stick of butter. I have to confess that I could not in good conscience add that much so I skimped, adding a lot less of each and I don't think it made any difference to the flavor.  It's rare that I venture off the recipe but I didn't want to end my week-long birthday party with a heart attack!

In conclusion, I got my meatloaf, I got my peas, I got my shoe fix on (boy did I—DSW offered me a birthday coupon and who am I to pass it up...so I bought two pairs!), and I cooked to conquer.

It was a grand birthday.  Until next year!

Mini meatloaves with roasted tomato thyme sauce – makes 6
Prep time 20 mins/cooking time 1 hour
2 tablespoons olive oil
1onion, finely chopped
1 large carrot, finely chopped
10 ½ oz minced beef
10 ½ oz minced pork
¾ cup fresh breadcrumbs
2/3 cup tomato passata* (Ann's Note:  see explanation below)
2 teaspoons Worcestershire sauce
1 egg, lightly beaten
1 tablespoon chopped thyme leaves, plus sprigs for garnish
7 oz mini roma (plum) tomatoes, halved
3 teaspoons caster (superfine) sugar, for sprinkling

*Passata is a pureed tomato sauce.  Internet research though, showed a wide variety of recipes and definitions.  The most basic ones just contained pureed tomatoes with a bit of salt.  Others wanted you to cook the sauce, adding basil and other spices, which to me says "spaghetti sauce."  I decided to use Pomi Strained Tomatoes "straight up" and think it worked okay.

Preheat oven to 325F.  Heat the oil in a large frying pan over medium heat.  Add the onion and carrot, season with salt and pepper and cook for 10 minutes or until softened.  Remove and transfer to a large bowl.  Add the beef, pork, breadcrumbs, half of the passata, Worcestershire sauce, egg and half the thyme to the bowl, season with salt and pepper and gently mix with your hands until well combined.

Divide among six 4 x 2 inch-sized ramekins and spoon over the remaining passata.  They'll seem very full but will shrink during baking.

Top each with a handful of tomato, ½ teaspoon sugar and season with salt, pepper and remaining thyme.  Bake for 50 minutes or until sauce is thickened.  Top with thyme sprigs to serve.

Peas Penelope – serving size not listed but easily served 4 or more
Ann's Note:  As I mentioned above, the ingredients for each recipe are illustrated rather than listed in the traditional way (e.g. 1 10-oz box frozen peas) and so I had to guess at the peas. 
1 box of peas, frozen
1 large clove of garlic, peeled
2 tablespoons sugar (Ann's Note:  wow, this seemed like a lot!)
1 stick butter
¼ teaspoon oregano
¼ teaspoon pepper
½ teaspoon salt
¼ teaspoon tarragon

Cook the peas according to directions on package (use minimum of water).  Ann's Note:  I have to say, I wasn't sure what to do here:  use the amount of water according to the directions or to skimp on that amount so as to use a "minimum amount of water?"  This puzzled.  So I used the amount of water listed on the package and then split the difference and drained some out!  I'm not normally that indecisive!

At the same time you are cooking the peas, add the clove of garlic that has been speared on a toothpick.  Also add the spices and then the butter.  Cook the peas a few minutes longer than the instructions on the package, then remove the garlic and serve.

Ann's Note:  Although this dish was good, I have no idea what the end result was supposed to look or taste like.  But hey, play with it and make it your own!


Monday, May 9, 2016

"Country Cuisine;" "The Duchess of Duke Street Entertains;" "The Great British Bake Off Big Book of Baking" - for Queen Elizabeth II's 90th Birthday!


Dates I made these recipes:  April 21 – April 27, 2016 – Queen Elizabeth's 90th Birthday

Country Cuisine by Elizabeth Kent
Published by:  Sidgwick & Jackson – London
© 1980
Recipe:  Carrot Vichyssoise – p. 117 – from Sharrow Bay (hotel) in Ullswater, Cumbria:  Chef:  Francis Coulson; Proprietors:  Francis Coulson and Brian Sack.

The Duchess of Duke Street Entertains – Edited by Michael Smith
Published by:  Coward, McCann & Geoghegan, Inc. New York
© 1977
Purchased at an estate sale
Recipe:  Louisa Trotter's Cheese Straws – p. 69-70

The Great British Bake Off Big Book of Baking by Linda Collister.   Includes recipes by Mary Berry & Paul Hollywood
Published by:  BBC Books
ISBN: 978-1-849-90483-4
Purchased at Barnes and Noble
Recipe:  Paul's Chocolate Volcanoes – p. 310

Right then.  Let me start off by saying that I hope "HM" (Her Majesty) appreciates the efforts I went through to produce some delicious delights befitting HM and her 90th birthday because folks, finding and making these recipes was a downright horrible exercise, what what!

Let's begin with a few points of culinary interest:  1) In 1994, my husband, Andy, and I went to England and considered ourselves most fortunate to have eaten fairly decent food while there.  This was at a time when the Brits were just getting the hang of edible cuisine.  But that said 2) most of their food is, I'm sorry to say, rubbish and I spent more time for this blog post eliminating food I wouldn't eat on a bet (like ""Smoked Mackerel Hot Pots"—oh me no think so!) than what I would eat.

Then 3) I eliminated recipes that called for hard-to-find ingredients (i.e. native to Great Britain but not here) or recipes that just took too damned long to make.  So there went half of the three book's contents right there.

And then there was this problem:  4) Some books like Country Cuisine had so many usable recipes that I wanted to "cheat" and make a bunch of stuff from that book and that book alone but that would break my own rules of one per cookbooks so I couldn't go down that rabbit hole.  Then other books like The Duchess of Duke Street Entertains was just bereft of anything usable or – dare I say – edible, and I had to work hard to find a recipe – any recipe – that would work.  Best I could do was Cheese Straws and I thought they would pair well with the soup so there you go.  And finally there was dessert which seemed like it would be easy except I had to eliminate anything made with yeast (due to previous efforts at making a doorstop), phyllo dough (I hate working with it) or anything requiring 2,000 or so steps before I could shove the thing in the oven.

So there was that.  And then, and it has to be said, I had to deal with measurements and converting measurements and that was no fun at all.  Not at all.  England uses grams for measures which is why you absolutely need a scale to do some of this stuff.  In fact, the very same day that I made this recipe, my friend, Star Tribune columnist, cookbook author and master baker, Kim Ode, wrote a column for the paper outlining essential kitchen equipment for amateur bakers as well as one for advanced and I am chuffed to say that although I don't bake a lot, I had all but one item from both lists.  As I commented on her Facebook page, I love my kitchen scale and marvel that I ever went without one.

And as a reminder, all of this was to honor "HM" whom I adore and who gets mad props for making it to age 90 (and 63 years on the throne) while looking fabulous to boot.  And all the dishes I made her paid homage to her in some way, shape or form.  "HM" is fluent in French, thus the vichyssoise, Brits love their crackers ("biscuits") and toasts at tea times (cheese straws) and "HM" loves chocolate so hooray!  And with the exception of the cheese straws, all of these turned out to be pretty darned smashing! (Details to follow.)

And now a word about the books:

Country Cuisine is a compilation of recipes from country hotels, inns and bed and breakfasts and it is "delightful" as the Brits would say.  I thought it especially appropriate that the author's name is Elizabeth Kent as Elizabeth II is related to the Duke of Kent; they are first cousins.  Most of the recipes in this book were sounded good and were pretty easy to make while others, as noted, sounded horrible.

The Duchess of Duke Street Entertains is based on a TV show – The Duchess of Duke Street – that aired on the BBC from 1975 to 1976.  The show spotlights Louisa Leyton Trotter a/k/a "The Duchess" who worked her way up from being a servant to a cook to being a Duke Street hotel proprietress.  I didn't watch the series but heard about it (it was Emmy-winning) and so there you have it.  This cookbook gave me the most trouble as most of the recipes just weren't "all that."  Again, I reference dishes like "Creamed Veal Kidneys" and "Kippers with Marmalade."  Ghastly.  The "biscuits" I made were okay but that was mostly my fault – I think.  The recipe said to add the egg mixture to the flour mixture to form a paste but the paste didn't form like it should.  I suspect more liquid was necessary but didn't know how much so left it alone.  I also think the dough sat too long in the fridge but that was my fault.

The last cookbook, The Great British Bake Off Big Book of Baking, got me back on track and thank goodness for that.  Say what we will about British cooking, baked goods – both savory [savoury if you are British) and sweet saved the day.  Baking doesn't usually involve icky ingredients although savory bakes can be dicey. 

Now if you're not familiar with the BBC/PBS show, The Great British Bake Off, acquaint yourself with it ASAP by watching it on PBS or YouTube. I'll wait.  In Britain, this show is several seasons ahead of where we are in America but I don't care because the show is fantastic!

The premise of this show is that several bakers, most of them baking at master or near-master levels, compete to win the show's grand prize.  Each episode has three baking challenges:  the signature challenges i.e. recipes they are known for; the technical challenge where they are given basic instructions for the challenge of the day and the showstopper where they have to make spectacular items like 7-tiered cakes that look good and taste good too.  Each challenge has winners and losers and then at the end of each episode, someone is cut and sent home.

Each challenge is judged by Mary Berry and Paul Hollywood (yes, that's his name), who are master bakers and whose recipes are included in this cookbook.  And each show is hosted by Sue Perkins and Mel Giedroyc.  Mel is an absolute stitch to watch and you will likely "luff" her.

The thing I "luff" about this show besides Mel is that the contestants are so absolutely polite with each other it's ridiculous.  And so British.  Even though they're in a competition they rally around each other each and every episode and it's touching.  Compare this to some of their American "counterpart" shows where every single day in that kitchen is a thrown down of some sort, sometimes involving knives, sometimes not.  "Uncivilized" is likely what the Brits would say with a good "sniff, sniff" in that way they have.

And I also love the judges and marvel at their own skill of being able to ascertain when someone's "bake" is just not quite on point.  Plus they're funny although Mary is much more quiet compared to Paul.

And with a last name of "Hollywood," it should be no surprise that Paul is the more outgoing.  And out of all the incredible edibles out of this cookbook, supplied by the bakers and the judges, I decided on his Volcano Cakes.  They were easy to make and seeing as how HM loves chocolate, this is as close as I could get to a birthday cake in her honor.

And with that, let's have a "Hip, Hip, Hooray" for HM and then off we go to the kitchen!

Carrot Vichyssoise – serves 8 – from County Cuisine
2 potatoes
4-5 carrots
2 onions
2 leeks
Ham bone or 2-3 rashers of bacon (Ann's Note:  thin slices of bacon)
2 bay leaves
2 ½ pints chicken stock
1 dessertspoon sugar
Salt and pepper
½ pint single cream (Ann's Note:  The Brits have "single cream" and "double cream" and best I can tell, half and half is probably the closest although I used regular cream without any problems."
Carrot cut in fine strips to garnish

Peel the potatoes, carrots and onions, then chop into small pieces.  Trim and shred the leeks.  Put all the vegetables into a large saucepan with the ham bone or chopped bacon, bay leaves and stock. Cover and simmer over low heat until the vegetables are tender.  Remove the bay leaves and ham bone and liquidize until smooth (or put through a sieve).  Add the sugar, then season to taste with salt and freshly ground pepper.  Blend in the cream, the slowly reheat (taking care not to let it boil) or chill thoroughly.  Just before serving (hot or cold), garnish with fine strips of carrot.

Louisa Trotter's Cheese Straws – serving size not given – from The Duchess of Duke Street Entertains
 5 ounces plain flour (Ann's Note:  plain flour is all-purpose flour)
4 ounces unsalted butter
2 egg yolks
2 ounces freshly grated Parmesan cheese
Good pinch of salt (about ¼ teaspoon)
Pinch cayenne pepper (optional)
1 teaspoon lemon juice
1 tablespoon cold water

Mix yolks, lemon juice and water together.  Rub fat into flour until sand-like texture is arrived at.  Toss in grated Parmesan cheese.  Season lightly, tossing well in.  Make well, pour in the liquids, mix quickly and form deftly into a paste.  Leave for 1 hour in a cold place.  (Ann's Note:  My mixture did not form a paste and I suspect it was because there was not quite enough liquid in the mix but I followed the directions given so....)

Roll out dough ¼-inch thick and then cut into 2-inch wide strips.  Place these onto a buttered baking sheet, mark out the strips into ¼ to ½ inch sticks.

Dredge with more grated Parmesan cheese if the budget permits!  Bake at 400 for 7 to 8 minutes, or until crisp and golden brown.

Remove with the aid of a palette knife to a cooling tray.  Divide when quite cool.  Store in airtight tin.

Ann's Notes:  Because the dough did not form into a paste, the rest of the instructions were difficult to follow.  I did my best to roll out the dough into a ¼-inch piece but failed and gave up trying to cut the dough into strips and sticks and just sort of threw the mess onto a baking sheet and hoped for the best.

The result was not half bad in the taste department but horribly awful in the looks department.  And I baked them for about 10 minutes as 7-8 didn't cut it.  If I had time I would make these again to see if I got different results but I didn't so there you have it.

Paul's Chocolate Volcanoes (Signature Bake) – makes 6 – from The Great British Bake Off Big Book of Baking
Unsalted butter and cocoa powder for the moulds
165g dark chocolate (70% cocoa solids), chopped into small pieces
165g unsalted butter, cut into small pieces
3 medium eggs
3 medium egg yolks
85g caster sugar (a/k/a "Baker's sugar," "Superfine," or "Fast-melting" sugar)
2 tablespoons plain flour
6 small pudding moulds

Grease the pudding moulds with butter and dust the inside with cocoa powder.  Chill for 30 minutes.

Gently melt the chocolate and butter in a heatproof bowl set over a pan of simmering water.  (Ann's Note:  or use a double boiler).  Remove the bowl from the pan and stir until the chocolate mixture is smooth.

Combine the eggs, egg yolks and caster sugar in a bowl.  Using an electric mixer, whisk together for several minutes until thick, pale, and mousse-like in consistency.  Carefully fold in the chocolate mixture, then fold in the flour, trying not to knock any air out of the mix.

Divide the chocolate mix equally among the 6 prepared moulds.  Place in the fridge and chill until firm. (You can make the puddings up to 24 hours in advance and leave them in the fridge until you are ready to cook them.)

Heat your oven to 400F.  Place the moulds on a baking sheet and bake for 8 minutes* until the puddings are risen but not cracked.  Ann's Note:  at 8 minutes*, the dough was raw so I added 5 more minutes to the timer and they were almost done.  Five more minutes got me closer but still not quite there so I added 5 more and after a total of 23 minutes, they were perfect.  I don't see how on earth they would be done in 8 minutes unless he used the tiniest "pudding" moulds on the planet.  I used small soufflé molds and still had to bake them for quite some time.

Also, I've had similar "volcano" cakes in Hawaii at Roy's and theirs differed from these because they need 45 minutes to bake and they flowed chocolate "lava" when cut open.  These do not and from the looks of the photo, they were not supposed to.  Instead, we got a lovely moist center and that was good enough for us.  Whether they were up to Paul Hollywood's or even "HM's" standards is another story for another day.